
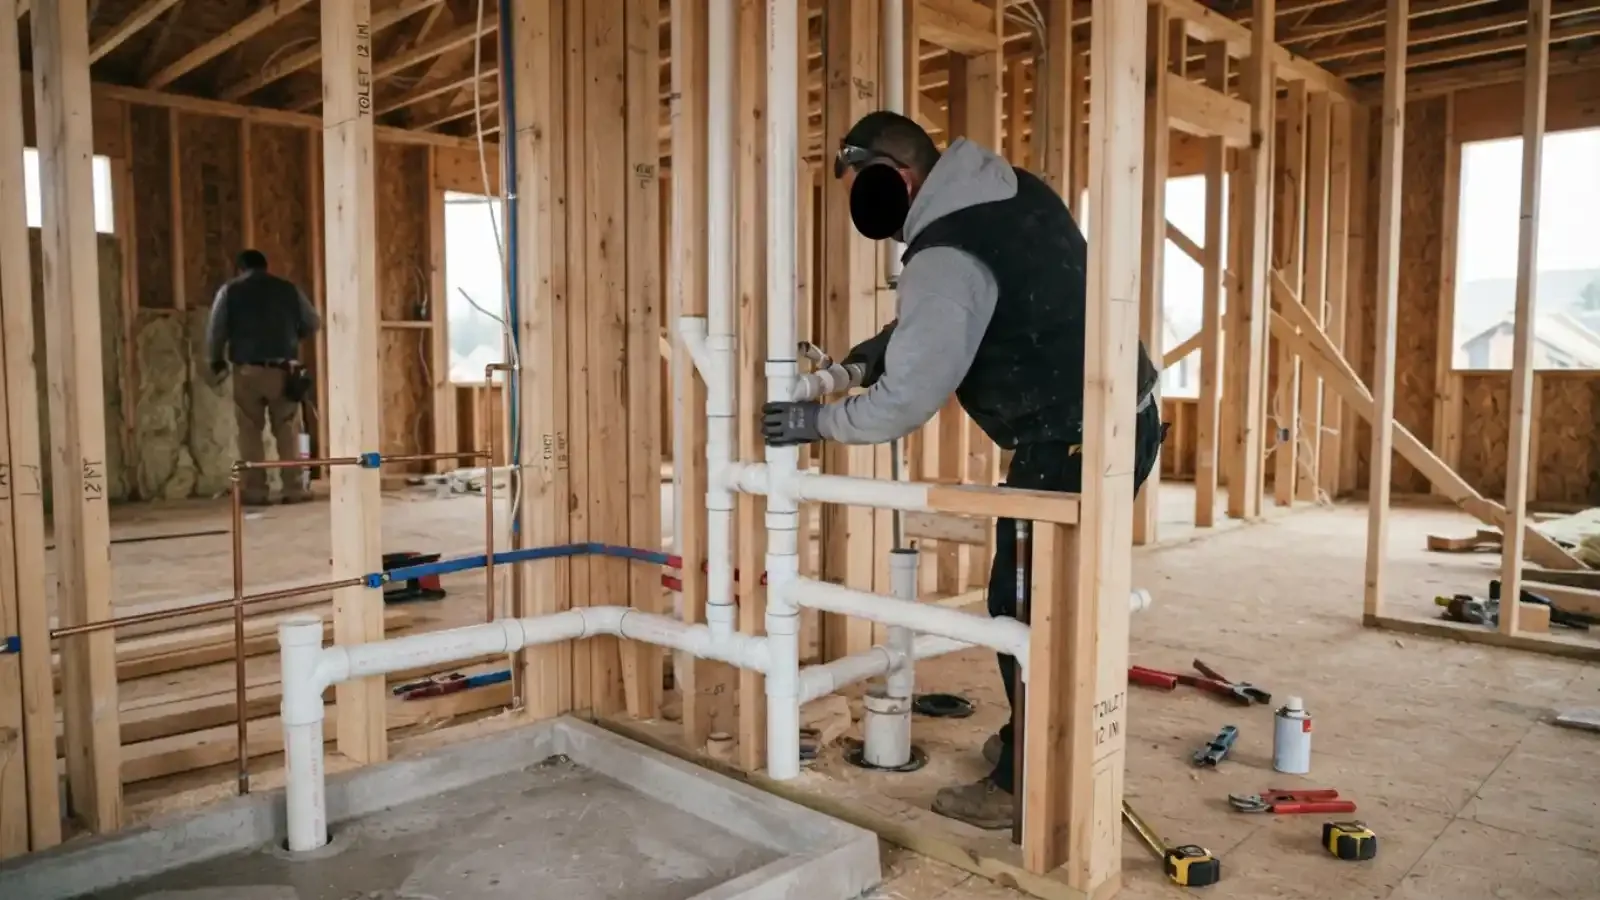
Definition
What bathroom plumbing rough-in means
Bathroom plumbing rough-in is the first phase of plumbing work, done while studs and subfloor are open. It places the drain lines, vent pipes, hot and cold supply stubs, and shower valve body where the fixtures will sit. Nothing is connected to a toilet, sink, or faucet yet, and every pipe end is capped or marked.
Rough-in decisions are hard to undo. A toilet drain that is an inch too close to the wall, or a valve set too deep, shows up after the tile is on. Plan the layout on paper, and confirm each dimension against the fixture spec sheets before pipes are cut.
Our plumbing installation team handles rough-in for new bathrooms, additions, and remodels, and quotes a clear price before work starts.
Typical rough-in dimensions at a glance
These figures are typical for residential bathrooms. Follow the fixture spec and local code, since models and rules differ.
| Item | Typical value | Notes |
|---|---|---|
| Toilet rough-in | 12 inches from finished wall to drain center | 10 and 14 inch models exist. Check the toilet's spec sheet |
| Toilet drain pipe | 3 inches or 4 inches | Match the flange and the fixture |
| Sink drain | 1.25 inch or 1.5 inch | Trap arm length is governed by local code |
| Shower drain | 2 inches | Often a 2 inch trap with a proper slope |
| Tub drain | 1.5 inch | Matches the tub's overflow kit |
| Vent pipe | 1.5 to 2 inches for fixtures, larger at the stack | Local code sets sizes and distances |
| Supply stub-outs | Often 1/2 inch | Hot on left, cold on right as a common convention |
| Vanity faucet stubs | Often 20 to 22 inches above the floor | Depends on cabinet and faucet |
| Shower valve height | Often 28 to 48 inches above the floor | Depends on the valve and user height |
Treat every row as typical. The fixture spec sheet and local code are the authority, and the Manhattan Beach building department can confirm what applies to your project.
Drains and vents: why both matter
A drain carries waste out. A vent lets air in behind it so water flows freely and traps do not get sucked dry. Without a vent, fixtures gurgle, drain slowly, and let sewer gas past the trap. In a rough-in, the vent is just as important as the drain.
Drain slope matters too. A common rule of thumb is a quarter inch of drop per foot for smaller drains, though code sets the real requirement. Too flat and solids settle. Too steep and water outruns the waste. Cleanouts and access points should stay reachable after the wall is closed.
Bathroom groups often share one vent. That works when pipe sizes and distances match the code. A wet vent or a revised layout for an ADU or addition needs careful planning, so ask your plumber or the local building department about your design.
Supply stub-outs and shower valve depth
Supply lines and valve bodies need exact placement relative to the finished wall.
Stub-outs and stops
Supply stubs come out of the wall or floor with a shutoff valve for each fixture, so a faucet or toilet can be isolated without turning off the house. Keep hot and cold at the spacing the faucet needs. Add air chambers or hammer arrestors where fast-closing valves could cause water hammer.
Shower valve depth
Every valve body has a depth range from the finished wall, printed on its rough-in sheet. Tile, backer board, and waterproofing add thickness. If the valve sits too deep, the trim will not reach. If it sits too proud, it fights the tile. Set depth with the final wall build-up in mind.
Pressure and temperature
A pressure-balancing or thermostatic valve protects against scalding when another fixture runs. These valves need correct hot and cold orientation. Test the valve with caps before any wall goes up.
Access
Shower valves are the part you will want to reach one day. A removable panel in an adjacent closet or cabinet saves a tile cut. Plan access before drywall.
Planning a bathroom remodel or addition?
A licensed plumber can walk the layout with you and put a clear price in writing before work starts.
Remodel sequence from demolition to final
The order matters because each step hides the one before it.
- 1
Demolish and verify
Open walls and floors. Check the condition of old drains, vents, and shutoffs. Decide what stays. A camera inspection of the building drain can reveal problems before you build over them, and our sewer camera inspection covers the lateral beyond the bathroom.
- 2
Set the rough-in
Place drains and vents, run supply lines, set the valve body, and cap everything. Photograph each wall with a tape measure in frame before closing. Those photos matter when you hang a mirror or cut a hole later.
- 3
Pressure test and inspect
Test drain and supply lines before covering them. A water or air pressure test shows any weeping joint. Ask the Manhattan Beach building department which inspections your project needs and when to schedule them.
- 4
Close, finish, and set fixtures
After approval, framing, backer board, waterproofing, and tile go in. Fixtures are set last, each tested for leaks once water is on.
Who decides what: a quick decision framework
Some choices are yours. Others belong to code or the building department.
| Decision | Who decides | What to check |
|---|---|---|
| Toilet position and rough-in distance | You, with the spec sheet | Fixture rough-in range and clearance |
| Pipe sizes and venting | Local code and your plumber | Ask the building department for current rules |
| Whether a permit or inspection applies | Manhattan Beach building department | Ask before demolition |
| Valve model and trim | You and your plumber | Rough-in depth on the sheet |
| Contractor licensing | State rules | Verify at cslb.ca.gov |
Manhattan Beach note
Licensing, sewer laterals, and hard water in a Manhattan Beach remodel
California requires a contractor license for projects of $1,000 or more in labor and materials. Verify any contractor at cslb.ca.gov or by calling 800-321-CSLB (2752). The CSLB advises paying no more than 10 percent down or $1,000, whichever is less, unless the contractor has a blanket bond on file.
If your remodel adds a bathroom, the new drain joins your sewer lateral, which belongs to the property owner under Manhattan Beach Municipal Code 5.36.240. The City maintains the main, and it asks for 24 to 48 hours notice before you flush or clean a lateral. The City's 2023 report puts groundwater hardness at 392 mg/L average, so plan for scale on valve cartridges and consider a softener.
Sources: Contractors State License Board, City of Manhattan Beach
ADUs, additions, and hillside lots
An ADU or a bathroom addition often needs a new connection to the building drain and a new vent path. Whether a permit, plan check, or inspection applies, and how a separate water line is handled, depends on the project. Ask the Manhattan Beach building department before design is final.
Lot shape matters. Hill Section homes sit on steep grades, which can affect where a drain can slope and where a vent can exit. Sand Section homes are close to the ocean, so corrosion-resistant hardware is a sensible choice. Neither fact replaces the building department's guidance.
Our crews also work in Hermosa Beach and Redondo Beach, where remodel questions follow the same pattern, though each city has its own building rules.
FAQs
Bathroom rough-in questions
Typically 12 inches from the finished wall to the drain center. Some models need 10 or 14 inches. Follow the fixture spec and local code.
Every fixture needs a trap and a vent path, but fixtures can share vents when the code allows. Your plumber can confirm the layout.
The valve's own rough-in sheet gives a depth range from the finished wall. Account for tile, backer board, and waterproofing.
Ask the Manhattan Beach building department. Rules depend on the work.
You can plan it, but drains, vents, and pressure tests take experience. Mistakes get buried in walls.
It can. Steep lots affect where the drain line can slope to the sewer lateral and where a vent exits. A plumber should check the route before the layout is final, and the Manhattan Beach building department can confirm what applies.